In addition to the other projects I’ve written about this week, I have other projects in various stages of beginning:
- Mystery Lap Quilt #1 – Aside from a brief introductory foray into quilting a few years ago which produced 2 small wall hangings, 2 slightly larger wall hangings/very small lap quilts (pictures forthcoming eventually), and a dislike of applique, I’ve stayed in the relative safety of baby quilts. They’re fast, easy, and well-received by the mothers (the child in question tends to be too young to express pleasure/displeasure. But the first one I’ve made is still in frequent use 2 years later so she must like it). However, they are rather to small for my taller friends (I won’t do them the indignity of calling them older). So I decided to be adventurous and swim in slightly deeper waters and try making a lap quilt. This particular quilt is ~60” x 80” which you might notice is the size of a queen size mattress. I figured it was a good size for a versatile quilt (being large enough to use on a twin or a full and as an extra layer on a queen bed without being too unwieldy to use on a couch). I have since decided that future lap quilts will not be that big. The thing has taken me the better part of a year to finish (I don’t actually remember when I started but it was probably around this time last year). Granted I’ve done most of the quilting by hand and have worked on other projects as well in that time frame both of which slowed me down. But still, 1 lap quilt a year is sub-optimal. Also, it’s hardly a ‘lap’ quilt anymore. Future lap quilts will likely be 45”-60” per side. Also, I plan to work on learning better how to machine quilt so I can hopefully do the quilting part faster. This quilt is almost done (finally!).
- Monster baby quilt – This one will get a full write up soon. Based on this pattern:
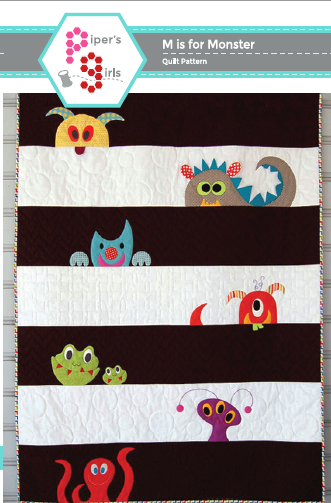 https://www.etsy.com/listing/174406336/m-is-for-monster-quilt-pattern but scaled down to the size I usually use for baby quilts.
 - Bicycle refurbishment – My poor bicycle sat outside fully exposed to the weather for the 7 years I was in college. It is not terribly surprising that the entire gear system was horribly dirty and possibly rusted and/or broken. I could have simply replaced it (as several people suggested I do) but where’s the fun in that? Besides, that’s no way to reward long years of loyal service. Also, it has a name. You can’t just get rid of something once you’ve named it. His name is Benji and he’s an ~10 year old Trek 700. I decided I would at least attempt to fix him myself and increase my knowledge of bike maintenance along the way so I could take better care of bike2.0 (either Benji refurbished or someone new) in the future. At this stage the bike is (almost) fully disassembled. (many many many thanks to the friends who helped me with that. Benji makes me feel like a weakling). I took Benji with me last time I cleaned my car (whose name is Crys) so, with the help of some simple green and quite a bit of elbow grease, now Benji is all nice and clean (one of the rims still needs a bit more elbow grease but I had run out by that point so I’ll get to it soon-ish). The next step is to use aluminum-foil to scrub the tiny rust pockmarks off the frame and then wax it. After that it’s research time. I need to replace the gear system ( a bunch of the teeth on both the chainring and the cassette are either worn down or cracked but the derailleurs seem ok) and might decide to replace the handle bars while I’m at it. And the cables of course all need replacing. Also, the seat either needs a cover or to be replaced. I need to research the various types available and decide what will work best for my intended use.
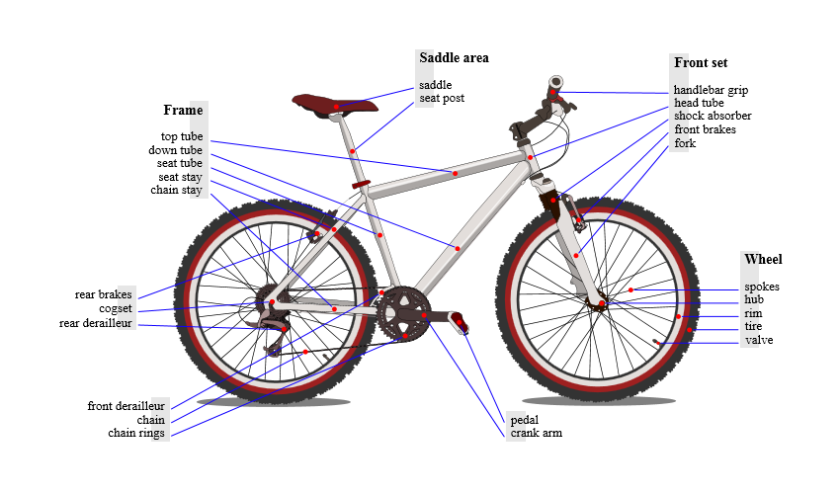
This project is a little more mechanical than most of my others but that’s good. I like mechanical and don’t do nearly enough of it. - I have a couple of clothing projects that are in something of a holding pattern because something about them frustrates me. I’ll get around to finishing them eventually…
- Gradient Baby Quilt: based on another pinterest find.
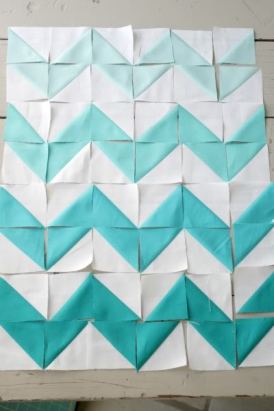
Here’s the pattern. Obviously that one is for a tote so I scaled it up to make a baby blanket (my blocks are 6 7/8″ (finished to 6″) instead of 3″) but otherwise I didn’t change much. Except the color. I had leftover blues in various shades from other projects so I used those instead of the pretty turquoise-y colors. I’ve got the pieces for 3 of the blues and 2 sets of white cut out but haven’t started sewing them together yet.
